Showing posts with label Crafting. Show all posts

Saturday, 20 June 2015

Brightening Up Everyday Jobs (Hillarys Blinds Craft Competition Entry)

Last week, Hillarys Blinds were kind enough to send me a metre squared piece of their lovely fabric, so that I could craft up something lovely, to enter in to their Craft Competition.

There were four lovely fabrics to choose from:


I chose the pretty, Orla Keily-esqe Daisy Pistachio and stared thinking of what to make.

When the fabric arrived, honestly, it was so lovely, I wanted to make a cushion from it!  I thought about a cushion trimmed with yellow ric-rac, to set off the yellow in the daisies.  A quick look at the craft competition entries from last year though, and the few starting to trickle on to this years' Pinterest board, suggested to me that a cushion just wasn't going to cut it.

I needed to be a little bit more creative with my entry, I thought.  But I was stumped.  Honestly, I had this lovely metre of fabric, and couldn't decide what to do with it!  This happens to me a lot with lovely fabric - I just can't seem to settle on the project worthy enough of cutting in to it!

Anyway, I dithered long enough that the deadline was looming and I just needed to get something done, so I changed tack.  What had I been meaning to make for myself for ages, but hadn't ever seemed to find the time for?  Would this competition bring the kick up the bum I needed?

While I was thinking, the washing machine started beeping at me - I'll just put the washing out while I think about it.  Then, oh my goodness, check out my peg basket!!


What a disgrace!  It's held together by duct tape, doesn't even hold all my pegs, and the slightest gust of wind tips it over, scattering my page all over the garden for the dog to eat!

So that was it, a new peg bag was getting made, but I didn't want the usual coat hanger style, as I thought that would probably fall off the line too.  I thought one that clipped on the line would be nice and secure, and still be able to be bought in the house easily when I'd finished using it.

I remembered a bag I was making, following the excellent instructions from Very Purple Person's blog. If you need to make a quick reversible tote, I recommend you check her tutorial out. 

I remembered that at the time, I thought that the handles could pop together.  I only wanted one handle for my peg bag though, so I went about changing the pattern piece.


I just put some baking parchment over the pattern and redrew, from half way along the strap, so that once cut on the fold, there would only be one strap on each side of the bag.  Does that make sense?  You could use any tote pattern in this way, if you'd prefer a squarer peg bag, for instance.  Also, you don't really need to 'box' out the curved bottom with the darts, but I think it makes the finished bag nicer.

From there, I pretty much followed the original pattern instructions, except when it came to sewing the strap together at the shoulder, I sewed each strap closed and then used my very handy Kam Snap tool to put a bright yellow snap in the centre of one of the flowers.


And voila, so much nicer than the old one!


And finally, and action shot of it hanging on the line!  I really love my new peg bag!  Is that totally sad?  Wait, don't answer!

Thanks very much to Hillarys Blinds for sending me this lovely fabric.  Mr Rowberry even commented that our new peg bag was nice and made in lovely fabric!

And I think I've just about got enough fabric left for a cushion … with yellow ric rac trim …!


Tuesday, 31 March 2015

'Frozen' bike bag

Oh my poor little blog! It's been totally neglected for months! I have felt so ill and tired that there was just no energy left for blogging. But, I'm starting to feel much better now, and so sewing and blogging can recommence. Hooray!

I will explain all in another post, but for now, I'd like to share a quick project I made for my big girl today. She had a new bike a few weeks ago and I have been promising to make her a bag for it. Of course, it had to be made with 'Frozen' fabric - what else?!

I am really pleased with how it turned out and it was a really quick and simple make, which is just as well, because of course the small girl wants one too and she will not wait!

I used this pattern from Sew Can She and made a couple of minor changes. I used Kam Snaps instead of Velcro, for the fabric loop that attaches the bag to the bike. I thought it would be stronger and look neater. My loop also goes over and then under the bar on the bike, rather than under and then over, as the pattern suggests. Again, I just thought it would look nicer that way. I also added a snap to close the flap to the front of the bag. I might also add a long shoulder strap, attached to both sides, so that the bag can be carried along, once off the bike.

There's plenty of room for all those 'precious' things, that change on a daily basis, and must be carried with us at all times!

We've been riding our bikes much more lately, now that I've swapped my sporty bike for a proper Mummy bike.

I love love love my new bike! The basket is big enough for a very decent picnic and the small one loves being towed behind. She will be joined in there soon, by a little furry pal. We're getting a puppy! The girls of the household are extremely excited. Daddy's yet to be convinced!

Here she is, three weeks old. Have you ever seen a cuter thing? She will be with us in 7 weeks, and will have us wrapped around her tiny paw in no time, I am sure.

Something I haven't shared on the blog so far is that I've started a little enterprise. I'm selling my sewn creations under the name 'Evie and Lola' through a Facebook page, Etsy and at local craft fairs. It's going well so far and I'm loving it. Pop along and give me a 'like' by following one of the links below.

I'm thinking I might just pop a couple of these bike bags in the store, what do you think?

Evie and Lola on Facebook

Evie and Lola on Etsy


Sunday, 11 January 2015

Customising Kids Jeans

It's been a while since I posted anything and I really need to catch up. I've got so much to tell you about. But for now, I thought I'd share a quick little project the biggest girl and I did this week.  

She's got some lovely skinny jeans from Zara, that were passed down to us. They have had lots of wear and the knees are finally giving out.  There's still lots of wear left in these jeans, other than the knees, so we decided to do a quick repair job. 

I had this image pinned on Pinterest for ages and to be honest, was glad of the chance to give it a go.  My girls usually outgrow clothes before they get to the point of needing repair, so this has been my first chance.  

I let Evie choose from a selection of fabrics in my stash, strongly pushing her towards one that amazingly very closely matched the accent fabric already on the jeans.  


Of course, being a 4 year old, the last thing she was going to do, was the thing I wanted her to do, so she chose some Frozen fabric. Of course!  Anyway, it turned into a cute opportunity to have Olaf peeking out from the hole in her jeans, so I wasn't too disappointed.  

For those of you with similarly clumsy kids, that fall often, and therefore get holes in their trousers, here's what I did:


Cut a scrap of fabric, bigger than the hole you want to cover, and cut a piece of bondaweb or similar, to the same size. Before ironing the fabric to the bondaweb, place it over the hole and trace an outline around the hole itself, and cut that middle piece out.  This is because you will want the fabric around the hole to stick to the jeans, but you don't want the fabric that shows through the hole to ge sticky, else you will end up ironing it to the other side of the jeans leg and sticking the leg together!

Next, iron the bondaweb to the fabric scrap. Remember that whereas you normally want the sticky side to be on the reverse of the appliqué fabric, in this case, you want the sticky on the front, so that it sticks to the reverse of the jeans, with the right side showing through the hole. 

Make sense so far? Still with me?


I then cut around the fabric so that it was patch shaped, with no corners (I find these are the bits that start peeling off first)


At this point, I noticed that the other knee was about to get a hole soon, so I made a little patch to reinforce that from behind too.  I didn't cut a hole in the middle of that one because the jeans are still just about in tact at that point and I wanted the glue over the weak point, to hold them together a bit longer.  I'm hoping that as the jeans wear out on that other knee, Elsa and Anna will start to show through!  

Peel the paper backing of your new patches and iron them on to your jeans, as per the instructions on your bondaweb/vliesofix.  

Turn the jeans the right way out and voilà, the hole is patched from the reverse and in this case, there's a cheeky little Olaf peeking through.   


The bondaweb should be strong enough that you can stop right there, especially if you got the strong stuff, but I fancied adding a bit of extra detail, as per the origional inspiration.  

Luckily, these jeans already had some decorative stitch details, and I had embroidery thread to match. 


So I just made a few cross stitches around the hole, which echo the features already on the jeans, and hold the patch in place a bit more.   This part was fiddly, since these are age 4 skinny jeans and therefore quite narrow. There was lots of turning inside/rightside out and muttering under my breath, but I really like the end result. 


More importantly, Evie loves it!


I secretly can't wait for Anna and Elsa to start poking through the other knee. And that won't be long, because I made the stupid mistake of telling Evie that's what will happen, so of course she's constantly picking at it, trying to get the hole open!!

Have you got any creative ways of getting more wear of your kids clothes? I'd love to hear about them.  

Thursday, 6 November 2014

Easy Button Art


Back in the summer, I was lucky enough to be invited by Fantastic Ribbons to become part of their 'craft posse' that tests and reviews their products for them. I jumped at the chance to choose some lovely buttons and tiny ric-rac from their range, and started planning what I could make with them.

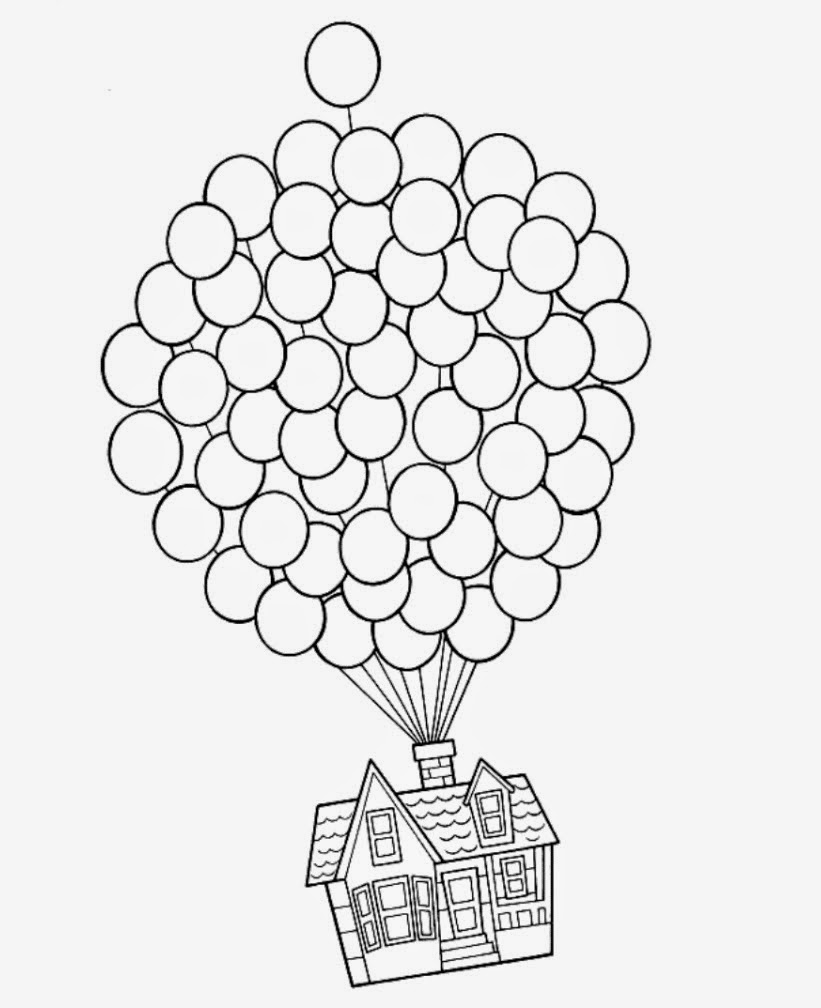
We had recently watched the film UP, which is such a lovely film, and when I tipped the buttons out over the table to have a look at them, they reminded me of the balloons in the film.
So, I googled for an image to copy, and came up with this:


I drew each element of the house out on the smooth side of bondaweb, back to front (mirror image). I cut roughly around each piece, leaving a few millimetres all around the end shape, and then ironed each little piece on to the back of various scraps of fabric. Once ironed on, you can cut around the shapes easily and the bondaweb stops the fabric from fraying.

Next is my favourite bit. It's like Fuzzy Felt for grown ups! Find some fabric the right size for your frame, peel the paper backing off each little fabric 'jigsaw' piece and lay them on the fabric, to form your picture. Once you've got all the pieces laid out how you want them, iron them on. The glue on the back of the fabric will melt and stick them all down. Genius!

I then did a little of free-motion machine embroidery around the outlines. There are good tutorials on the web on how to do this (I like the one by Urban Threads, here) but essentially, you just lower your feed dogs, change to a free-motion embroidery foot (or remove the foot all together) and off you go. Without the feed dogs, you can move the fabric in whichever way you choose and it's just like drawing, with your machine. Considering I don't really like drawing, and am quite frankly rubbish at it, I love free-motion embroidery. It's so much fun and looks so effective.

I didn't want the picture to be all machine stitched though, so I took some sparkly embroidery thread and hand stitched the windows. I then used a disappearing fabric pen and wrote 'Adventure is out there' in deliberately script-y writing. I hand embroidered over my outline using back stitch, and then sprayed the fabric with water, to erase the pen marks.

What I should have done next, and now need to go back and fix, is machine stitch straight lines from the chimney, to where the 'balloons' would go, to make the strings for the balloons. I don't know how I didn't realise I'd forgotten to do this, until after I'd framed the picture!

Finally, the really fun bit. I had Evie sit with me, playing with the buttons and choosing which one came next, as I sewed each one on with silver sparkly thread. I sewed the buttons close together, so that they would overlap slightly and look like the bunch of balloons used to fly the house in the film.

Finally I found some card, the right size for the frame, and stretched the fabric over it, taping it down with parcel tape on the back. I used a box frame from IKEA, so that there would be space for the buttons, without squashing them.

What do you think? What would you do with a bag of pretty buttons?


Wednesday, 5 November 2014

October in Pictures

Ok, I'm a bit late, but I thought I'd have a little round up of October, via the photographs on my phone. You'll have noticed that I don't often post photographs of my girls on the world wide web, especially not without having their faces obscured. This month, it seems to have left my photo roll a bit sparse. Either that, or we just didn't do much in October!
I've been busily turning Kitschy Coo's Skater Dress pattern in to princess dresses. I just love these. I spent a very pleasant evening drawing out lots of variations, including superhero versions, and can't wait to make them all. My girls inevitably love Disney princesses. You just can't avoid it, however much you try, but I can't bear to see them running around in those horrible, scratchy, polyester versions that you see every other four year old wearing. They are just as happy in these lovely soft jersey versions. In fact, they love them because I have made them (they are so proud when I have made them something, and tell everyone they see - something I am enjoying every minute of, as I imagine it won't always be the case!) I am happier with these too, because they last better, wash easier, and they can wear them to the supermarket without looking silly!!
I've also been making lots and lots of cushions, using TIDNY colouring book fabric from IKEA. I've been selling these through my Facebook shop and they are really popular. I knew that they were a good idea and would be popular, but I had no idea how much! I ended up buying an entire bolt of the fabric, and I am so glad that I did, because it seems to be out of stock everywhere now. I am just waiting for a break in the cushion making, so that I can make the girls dresses out of it - I think it would be so cool for them to be able to colour in their own dresses!
I have to make up for not publishing photographs of my girls by including pictures of my ridiculously cute cat at every opportunity. Here she is being very helpful while I cut fabric!
I haven't done much baking this month. Partly because we are trying to eat more healthily, but mostly due to the lost mojo that I have previously mentioned. But this almond banana loaf was lovely (GF of course).
It was our 5 year wedding anniversary in October and having never left our children with anyone overnight, and being badly in need of a full night's sleep, we treated ourselves to a night in a spa hotel. I will review the hotel in another post, but enough to say now that it was amazing and catered to my diet requirements really well - even producing a gluten free scone!
I had a really proud mum moment a few weeks ago when, on the way home from nursery, Evie asked if we could 'make her jeans prettier'. Oh my gosh, she was asking to customise her clothes. I was so pleased. So as soon as we got home, I pulled out some odds and ends of lace, some sequins and my glue gun, and we customised her jeans. It was so much fun, she loved it and her jeans look really cool. She was so proud of them too.
Lola loves her big sister so much, she wants to do and wear everything Evie does, so I had to make her a princess skater too. This is Aurora, from Sleeping Beauty.
Our day at the spa allowed me to read more of a book than I have in the last year. I read at least a chapter!!!
While I haven't been baking as such, I have been trying other things in the kitchen. The homemade marshmallows that I wrote about here were delicious. I've been trying out gluten free packet mixes too. My review of the chocolate cupcakes from Helen's foods is coming soon.
This month I had my first ever craft stall. It was a really fun day and I've got another couple booked in the run up to Christmas. I love making gift type items and hopefully other people will love what I make, enough to buy them!
So that was our October. Quite nice and chilled with lots of time at home crafting and pottering in the kitchen. November and December will be busy. We've got lots of weekends away planned, Lola's birthday, and of course Christmas, so it will be hectic. I can't wait!


Tuesday, 22 April 2014

Calling All Kids: Knight Hoodie

Well here I am, three days after the end of Alida's Calling All Kids series, sharing my make. Too late, but I might as well share it anyway!

I loved the idea behind this series. As I have said before, a big part of why I love making clothes for my girls is that I get fed up of the gender stereotype in store bought clothing. It's all blue for boys and pink for girls and just try deviating from that! I get especially cross when I try to buy shoes for the girls. Especially the 'proper' ones. I usually manage to find one red or purple pair. The rest are all pink.

Not that I dislike pink. Not at all. Fuschia pink is one of my favourite colours. But, I don't wear it often (I did dye the underskirt of my wedding dress bright pink, but that's another story) and I would like there to be choices.

One of my favourite pictures from our wedding, but I ruined my dress to get it!

Evie chooses princesses and Hello Kitty on her pants, but she would also like diggers and dinosaurs like the boys have. Why can't she have a 'Cars' or 'Planes' t-shirt? She has to have Tangled instead? She loves Tangled, but so do her little boy-friends. My three year old loves to wear top to toe pink and dress as a ballerina for the day, but she also loves to dress as a doctor, explorer or pirate, and if I ever get my act together to make the long-promised TreeFuTom costume, she will dress as him too.

When I ask her what she would like me to make for her, it often goes along the lines of 'a t-shirt with a dragon on' but she will choose pink flowery fabric and ask for sparkles on it. Now I'm not up for the mega shopping trip that it would take to find such clothes, so I'd better get making some for her, huh?

Anyway, you get my point. So back to Calling All Kids. The Knight Hoodie by Charming Doodle seemed just perfect for this to me. Evie would love a knight costume to go with her sword and shield (see?)

I've got to say that Calling All Kids and Kids Clothes Week didn't go as well for me as I had hoped. I had forgotten about the a Easter break from nursery and my two days of sanity in the week. Also, everyone got ill. Ending with me being in bed for the last three days of the challenge.

There were other challenges in this hoodie too. The pattern was great and none of my challenges were due to that. But I do like to make life hard for myself wherever possible, so of course, I chose this shiny silver fabric for the armour, that was slippery as hell and did some weird fraying when stretched even slightly.


Then I decided to line the hood. Fine, not difficult at all, especially having recently made Kitschy Coo's reversible hoodie. But, again, looking to make life hard, I chose the satin stars fabric left over from making Evie's superhero cape. It was difficult to work with then, so why I thought it should be any different now, I have no idea!

Also, I bought the wrong zip. I did not realise, until I'd sewn it in, that there was a difference between a separating and non-separating zipper! I know! Obvious now that I think about it, but that's the problem - I hadn't thought about it. I just ordered a zip. So, I unpicked that zip and left the hoodie sitting around for a week, while I waited for the new zip to arrive, by which time, I was ill.

So, yesterday, Easter Sunday, I got to finishing it off. I was very pleased with the matching seams on my pockets.

And at the neck

The bottom of the zip was a bit off, but that issue was with the cuff, and I wasn't going back to fix that.

But I wasn't happy with this:

The tops of the chin bit (proper term??) don't line up, and what do I do with those extra bits of zip? I showed the husband, who as usual, said leave it, it's good enough. Also as usual, I listened to him, and promptly ignored him. Off I went to find my unpicker ...

And I'm glad I did, because second time around, it looks like this:

Much better! I am so glad I changed this because it would have constantly annoyed me. And because when it's zipped up, it's right in front of her face, it's really noticeable.

Regarding the zip ends, I trimmed them slightly (taking care to leave a little bit of the fused bit at the end, that stops it fraying) and then turned and folded them over, and hand sewed them down.

At this point, I had to stop, because the family wanted to go out. Shock, they don't want to sit around the house at the weekend while I sew!! But Evie was eager to wear her hoodie now that she could see it had a zip, so we got these pictures before adding the hood armour.

Finally, last night, I attempted take two of the hood armour. The first had frayed too much when I turned it the right way out. (Before you say it, yes I do know that it was because I left too small a turning hole). Not quite done with making it more complicated than it needed to be, I decided to attach the visor with poppers, so that it could come down in front of the face, like proper armour.

Good in theory. Worked well as I tested it ....... And then she tried it on:

Ok so far .......

Oops! Got those measurements off then!

Ha ha, it would certainly protect her face!

So there will be a third piece of helmet armour. But not yet, because for now, I am so done with this make! I love it, she loves it, I am done.

And as if to prove the girl wanting 'boys' things on her clothes issue ..... Here's what she was wearing underneath.

Customised by me, at her request, this time a year ago (to wear on St George's Day). "A green dragon, with sparkly thread, and a button please Mum". Coming right up madam!


Thursday, 10 April 2014

Kids Clothes Week - Mid Week Update

So, here we are half way through Kids Clothes Week and I have one finished item of clothing. Not nearly as much as I had hoped, but I had spectacularly over estimated the time available to me, as usual. Especially considering it's half term, so I've got no child-free time this week.

Here's the dress I have finished:

The 'Windy Day' dress for Evie. So called because the main fabric is Michael Miller's 'Backyard Baby' from the 'Windy Day' collection. But conveniently, it is also a perfect dress for windy spring/summer days, as it's double sided, with a layer of fusible fleece in between. This makes it super soft and snuggly, gives it shape and makes it that bit warmer for slightly chillier days.

I had been asked for a copy of Lola's Windy day dress, but Evie's needed to be slightly different because there wasn't quite enough fabric and I wasn't going down that road again! The roses fabric is an old pair of my PJ's and the pocket was on the PJ top, so I just picked it off and sewed it to the dress.

The reverse is a bit (lot) plain. I think I probably should have embellished it somehow. Perhaps that little pocket would have been better on that side? I think it's likely to be worn the other way around mostly anyway, for sister-matching, so it probably doesn't matter. The sister-matching is at Evie's request by the way. Not that I don't absolutely love it, of course I do, but I just want you to know that I'm not forcing matchy-matchy on them against their will. As if I would! (Ha)

The eagle-eyed amongst you will have spied a safety pin on that shoulder there. Oh yes, that's because when I said I'd finished this, I didn't quite mean if was in a wearable state. Sorry. That's because right at literally, the last second of making, this happened:

Ugh! Those little snap spikes, apart from being potentially very scratchy, are stopping the snap from closing. I have tried to undo it, but I am generally a very cack-handed person as if is, without one hand having carpal tunnel and the other recovering from carpal tunnel surgery, so I think it's best I let the hubster deal with this one.

So, moving on, and pretending the snap thing didn't happen, so far, so good. One outfit completed. This little pile arrived yesterday and has been washed and dried ready to make the knight hoodie. In the meanwhile, a fellow graduate of Janet Lehain's sewing courses came round last night, so that we could work on Kitschy Coo's Reversible Hoodie together. We had pre cut our fabrics and started sewing at about 8pm. At midnight, we were ready to stop for the night, but realising we were very close to the end, decided to push on. By 12.30 we had a fully working hoodie, just needing pressing, top stitching and closing the hole used to turn it the right way out. Excellent! We both came away very pleased with ourselves.

And that is where I wish the story ended. With a fully working hoodie. Because I don't have one now!!

I came downstairs this morning, bleary-eyed (due to the late bedtime, loudly snoring hubby (he's ill) and regular wake ups through the night by a badly teething baby) but excited to show off my work and finish it off. The family responded well, cooing appropriately and Evie demanding her own version.

I pressed, top stitched, sealed the hole, admired my almost-pattern-matched polka dots and tried to ignore the badly matched seams and the little blue marks left on white spots by the iron (well, you can't have it all!)

then I zipped it up, so that I could hang it up at photograph it, for you, my dear readers. That's when this happened:

I kind of think I'm going to need that pully bit, to make the zip work, you know? That's right, I zipped up the zipper and pulled it right off the top.

So, does anyone know how I can fix this, without unpicking the top stitching, undoing the little hole, turning it all inside out, removing the zip, buying a new zip, and then doing it all again? Because really, that's going to take longer than it took to make the damned hoodie in the first place!!

I bring you this story to make you feel better about your own sewing. Because there's nothing going to make you feel good about your own sewing, more than seeing someone else's mistakes!